Upgrade Door Speakers on a 2017-on FIAT 124 Spider
Posted by Brett Melancon on May 28th 2021
Upgrade Door Speakers on a 2017-on FIAT 124 Spider
Tools needed
- Phillips screwdriver for door panel
- Plastic or small hook for door panel trim
- 10mm socket for speakers
- Xacto blade for trimming tweeter mounts
The new FIAT 124 Spider has a lot going for it, great handling, power and amazing styling. The base stereo on the other hand is not much to get excited about. The optional Bose system is better but if you are stuck with the base stereo, there is hope for better sound and it is not difficult to achieve.
The speakers being used for this upgrade are Rockford Fosgate R165X3 Prime 6.5" Full-Range 3-Way Coaxial Speakers with Kenwood KFC-ST01 1-Inch balanced dome tweeters to round out the sound. The speakers required a speaker wiring adaptor from Mazda for easy installation.
Remove the door panels
The first thing that needs to happen is to remove the door panels. This may seem like a daunting task but it is not hard once you know where to pry and pull.
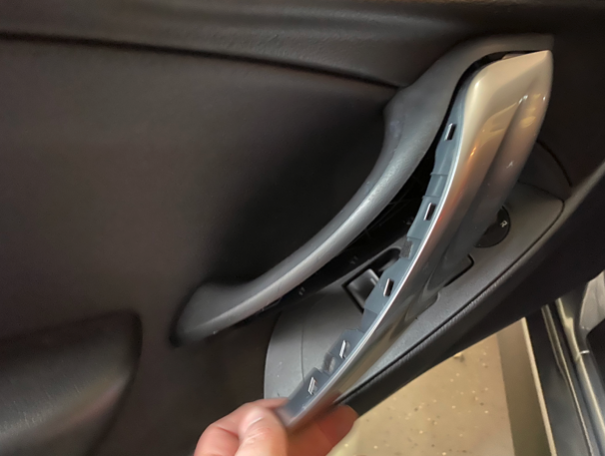
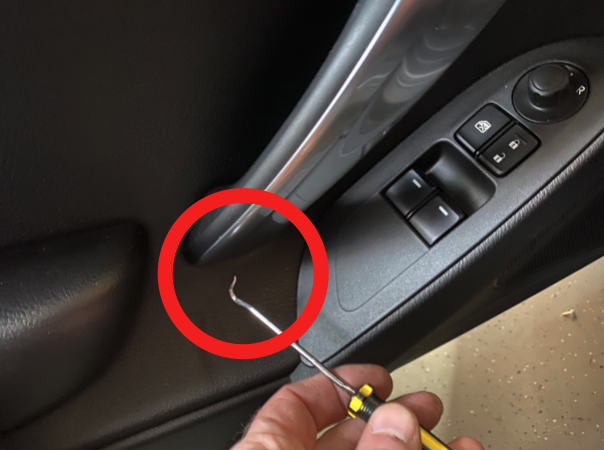
Use a sharp pick to gently pry the bottom of the silver door handle trim off enough to grab it and pop it loose. Be careful to not damage the finish. Once this trim is removed, it will expose two phillips head screws that will need to be removed.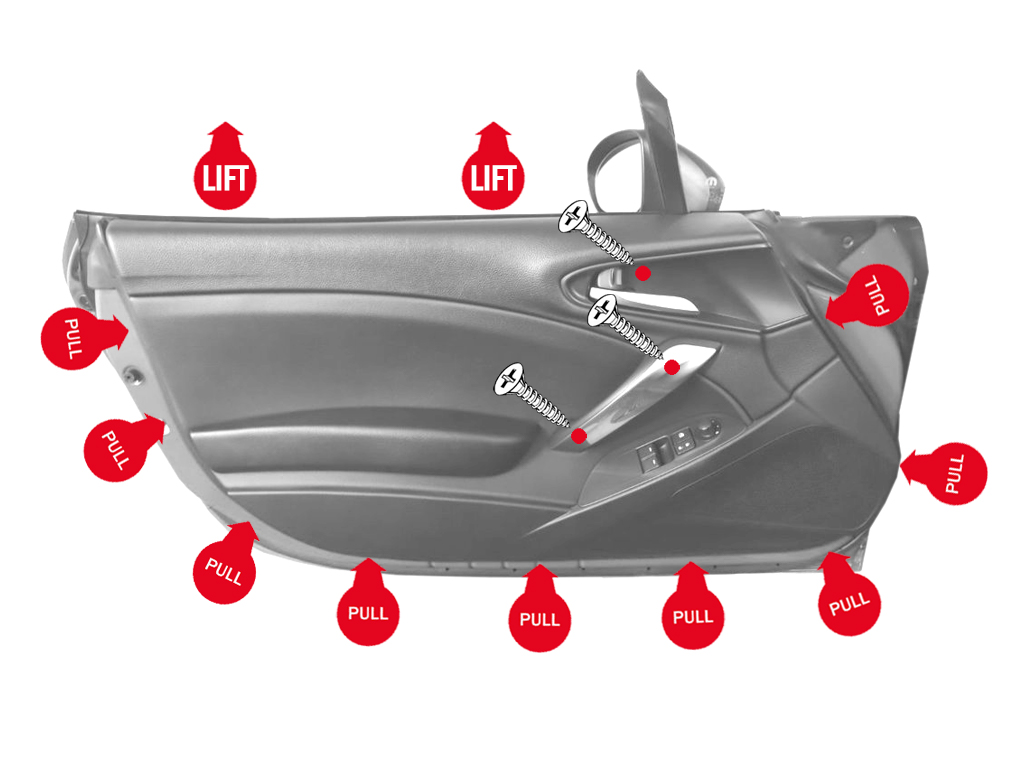 Next, gently pry the cover from behind the door latch with a plastic trim hook or your fingers. It will pop out to reveal a third phillips screw. Remove these three screws.
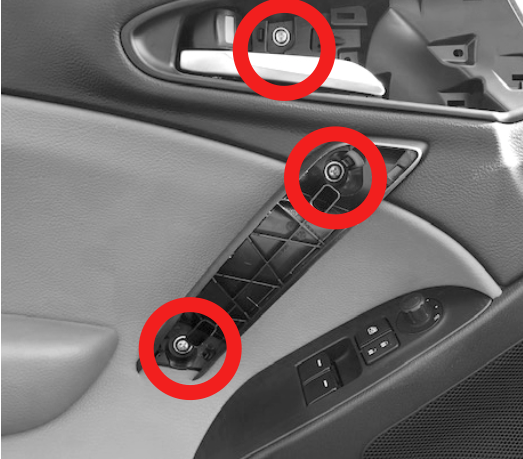
Once they are removed, gently pry from the bottom of the door panel, it easiest to start from the lower, outside edge of the panel and work your way around from the side and bottom.

Once you have all of the panel clips popped off, lift up on the door panel and slide the door handle out of the housing (it comes out easily and is not attached).
With the door panel removed, you can see the speaker area and will notice three 10mm bolts holding the speaker into the door. Remove these bolts and disconnect the factory speaker. Notice how lightweight the OE speaker is compared to the aftermarket speaker.
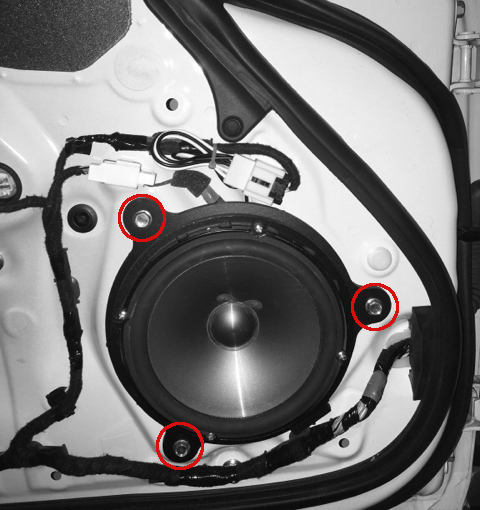
Remove the factory speakers and position the replacements. Source a factory wiring clip from Mazda to make the connections cleaner and easier. Route the wires and ensure that nothing is being crimped or stretched when the door panel is reinstalled. You may elect to use a speaker mount adaptor if your chosen speakers do not fit the factory mount.
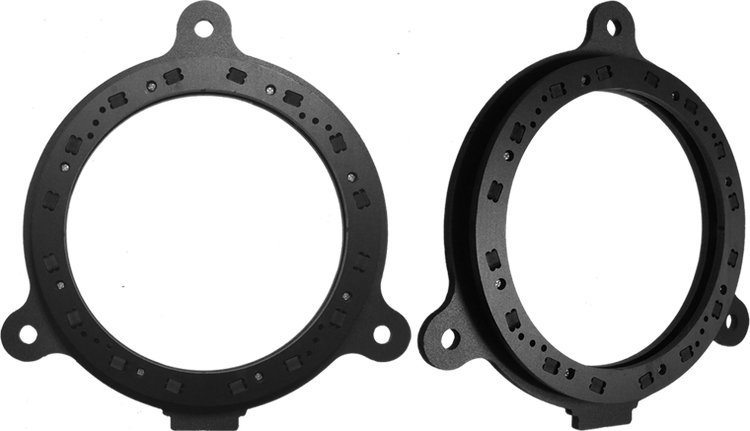
MJM adaptors – model SAK 112
Reinstall the door panel in the reverse of removal.
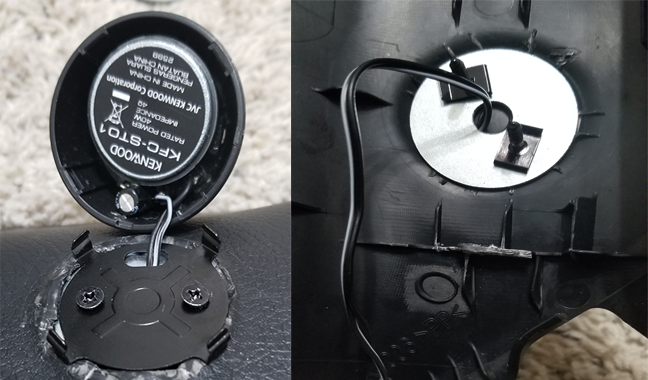
Tweeter installation
Start by removing the A-pillar plastic trim. It is easy, just place your fingers under the edge and give it a quick pull, it will pop right out. You may also pop out the small filler trim piece at the bottom so pay attention to how that goes back in.
Pull down on the plastic trim enough to disconnect the factory tweeter. It has a quick connect and will pop right out with a tug. Cut the wires going to the factory tweeter and splice the new tweeter into the harness.
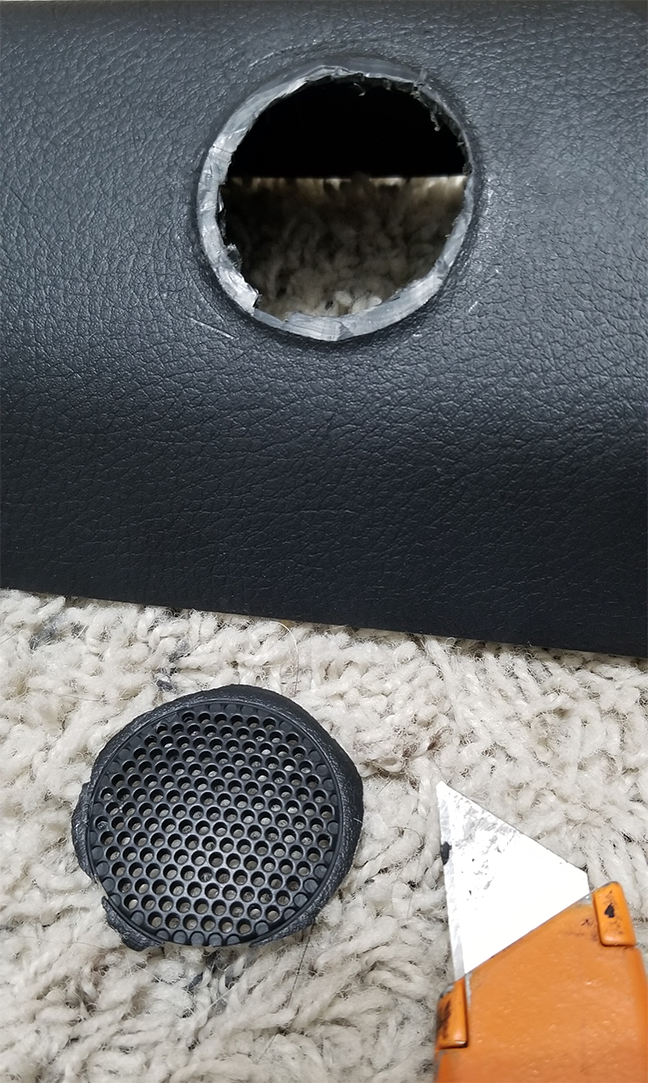
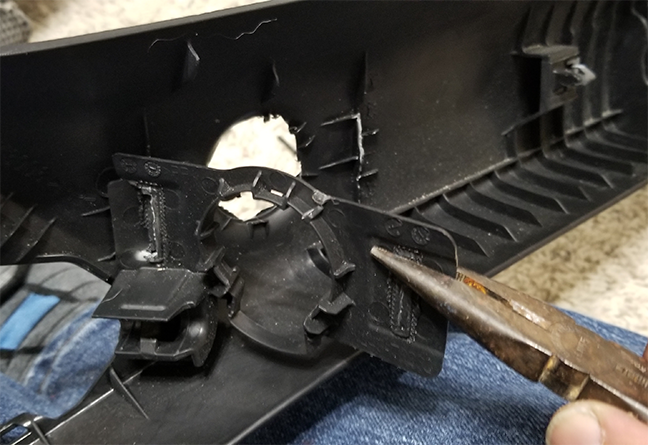
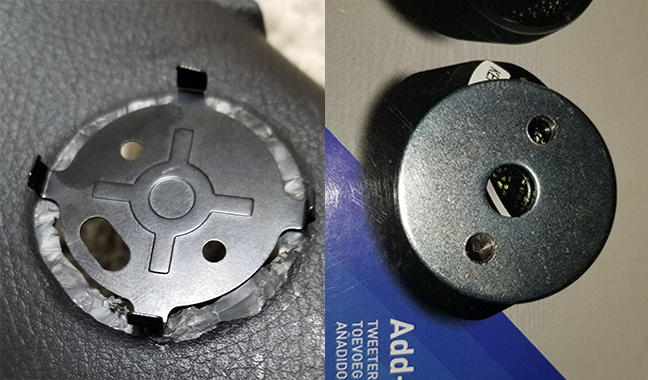
With the plastic trim removed, take a sharp Xaxto knife and cut around the grill opening. Take car to not trim more than you need, you want to be sure that whatever tweeter you have will cover the hole. Next, pry the plastic tweeter mount from the inside of the trim and remove that with needle nose pliers. This will make it easier to mount the new tweeter.
Depending on what kind of tweeter you choose, your mounting will vary. My Pioneer tweeters had a surface mount and I used a 1/2" fender washer with two holes drilled to accommodate the tweeter mounts. With the mounting parts and washer, I attached the new tweeter to the plastic pillar trim. In the case of the Pioneer tweeter I chose, it simply snapped into the mount and completely covers the hole that was cut in the trim. Splice the new tweeter wires into the factory connections and pop the plastic trim back onto the A-pillars.

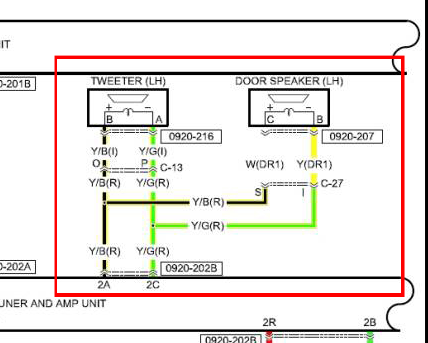
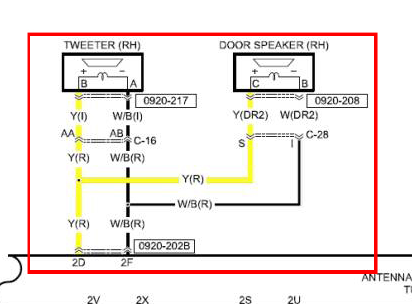
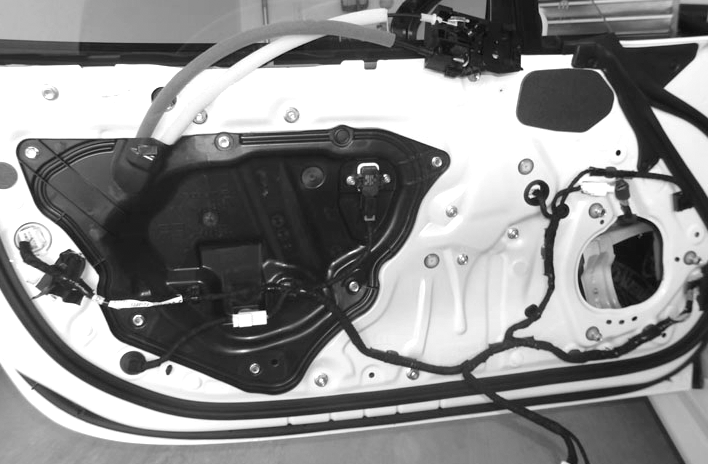
Factory wiring for reference