Front A-arm bushing replacement tool instructions for FIAT 124 Spider
Posted by Csaba Vandor on May 28th 2021
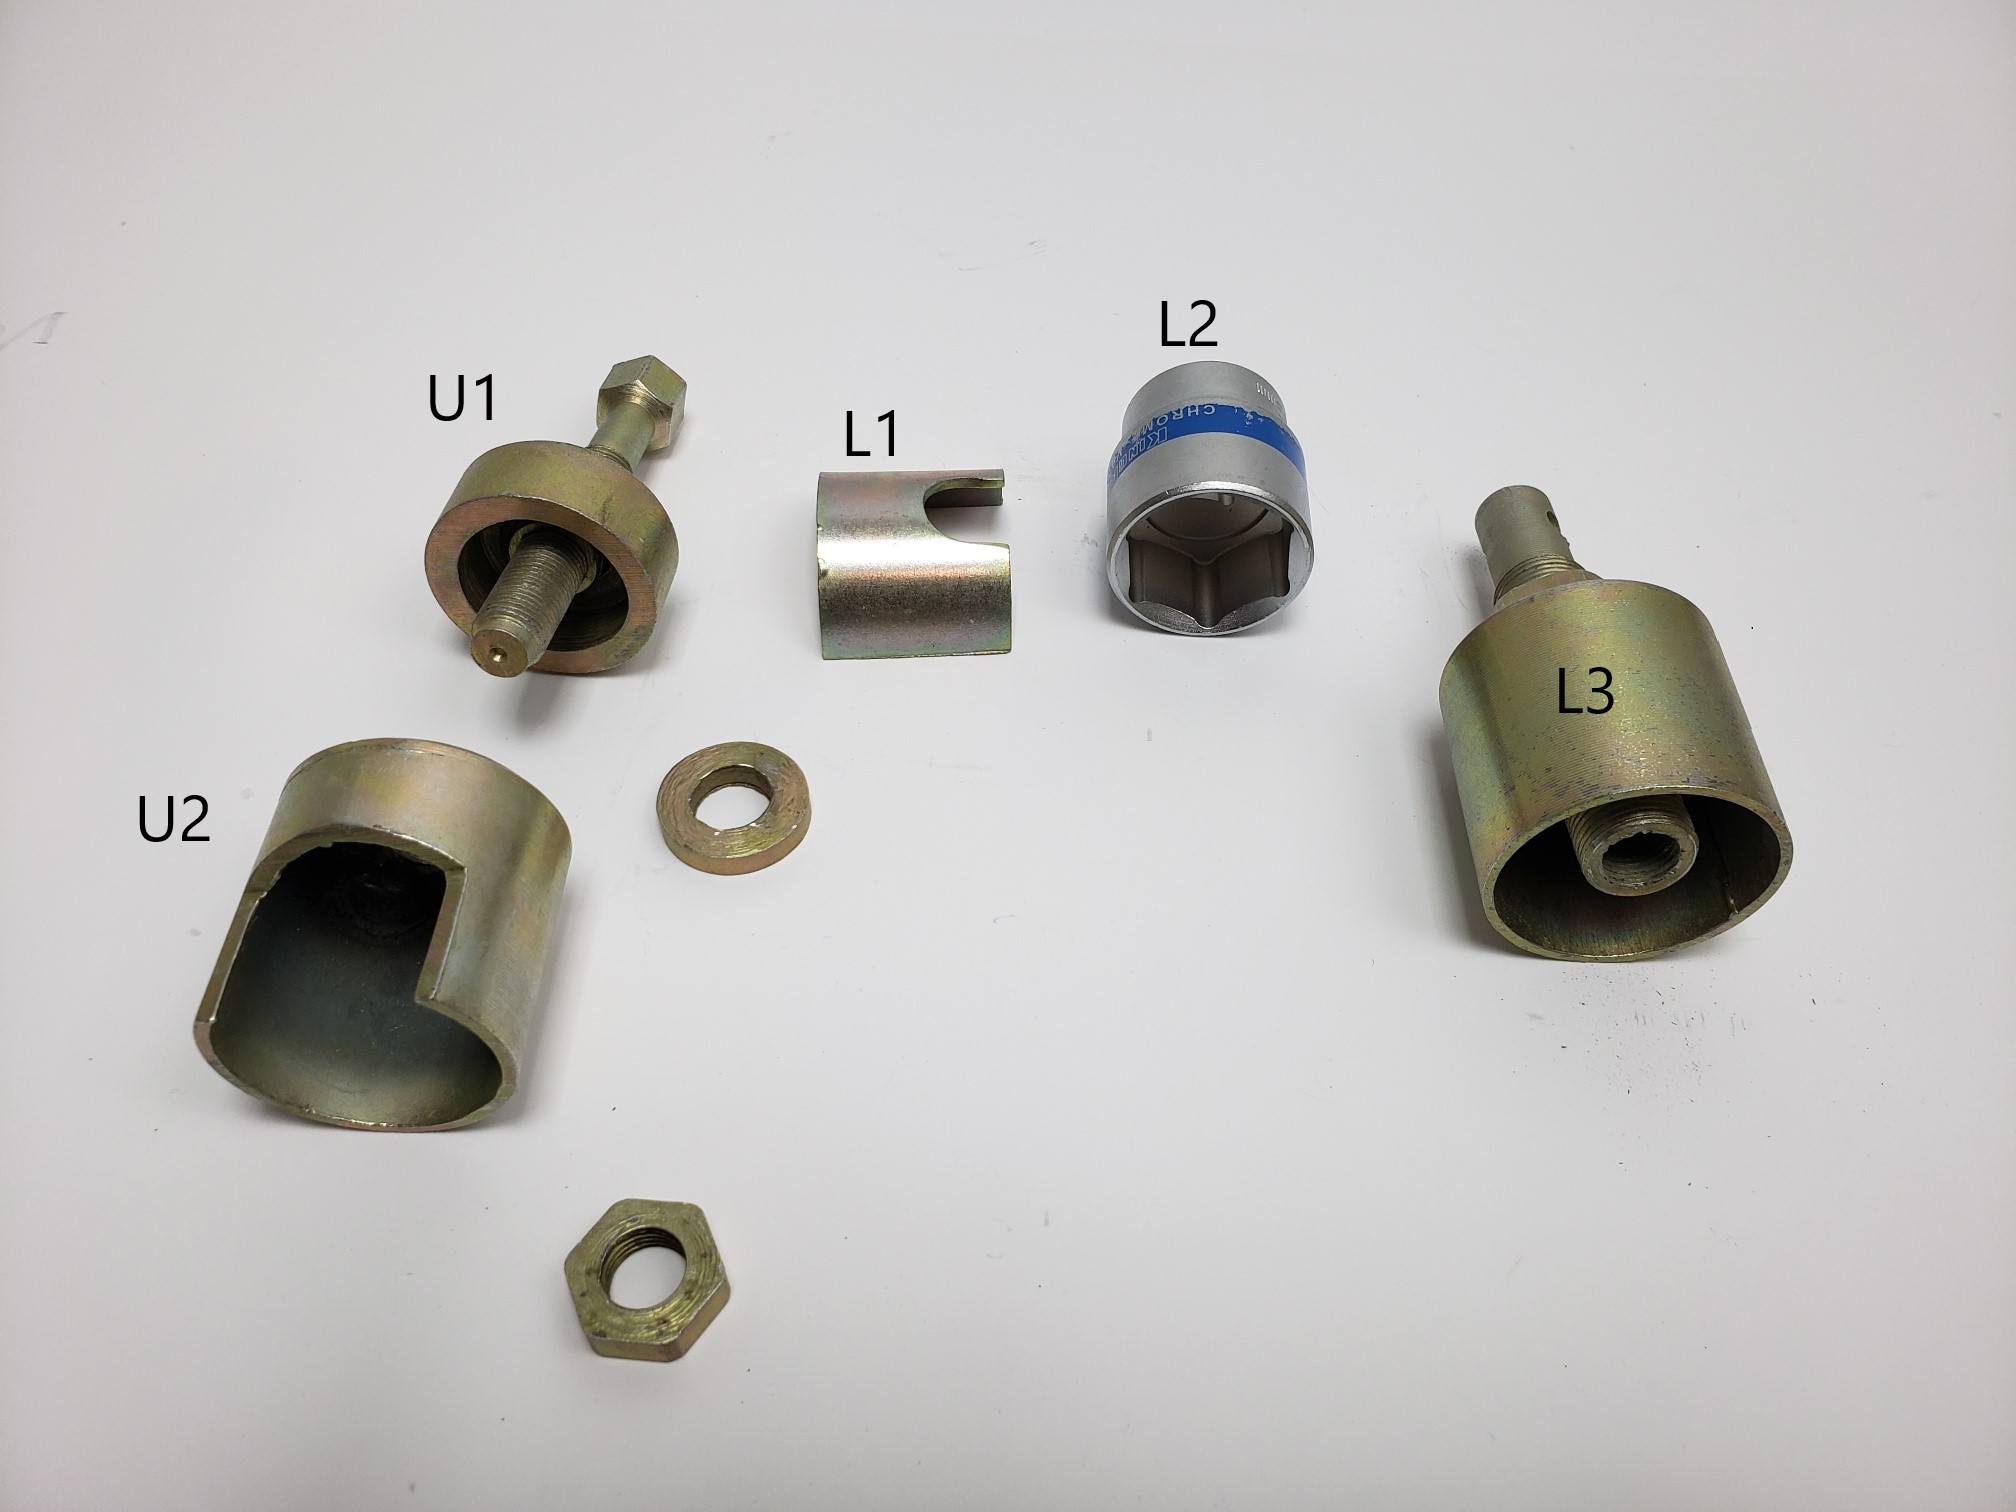
Front A-arm bushing replacement tool (SU2-410) instructions
This tool allows the replacement of front control arm bushings without the removal of the spring or lower arm.The upper arm is best done outside of the car.
Please observe common sense safety. Be sure that the vehicle is stable when using ramps or jack stands.
Please read and understand each section of the instructions before beginning work on that section.
Tools needed:
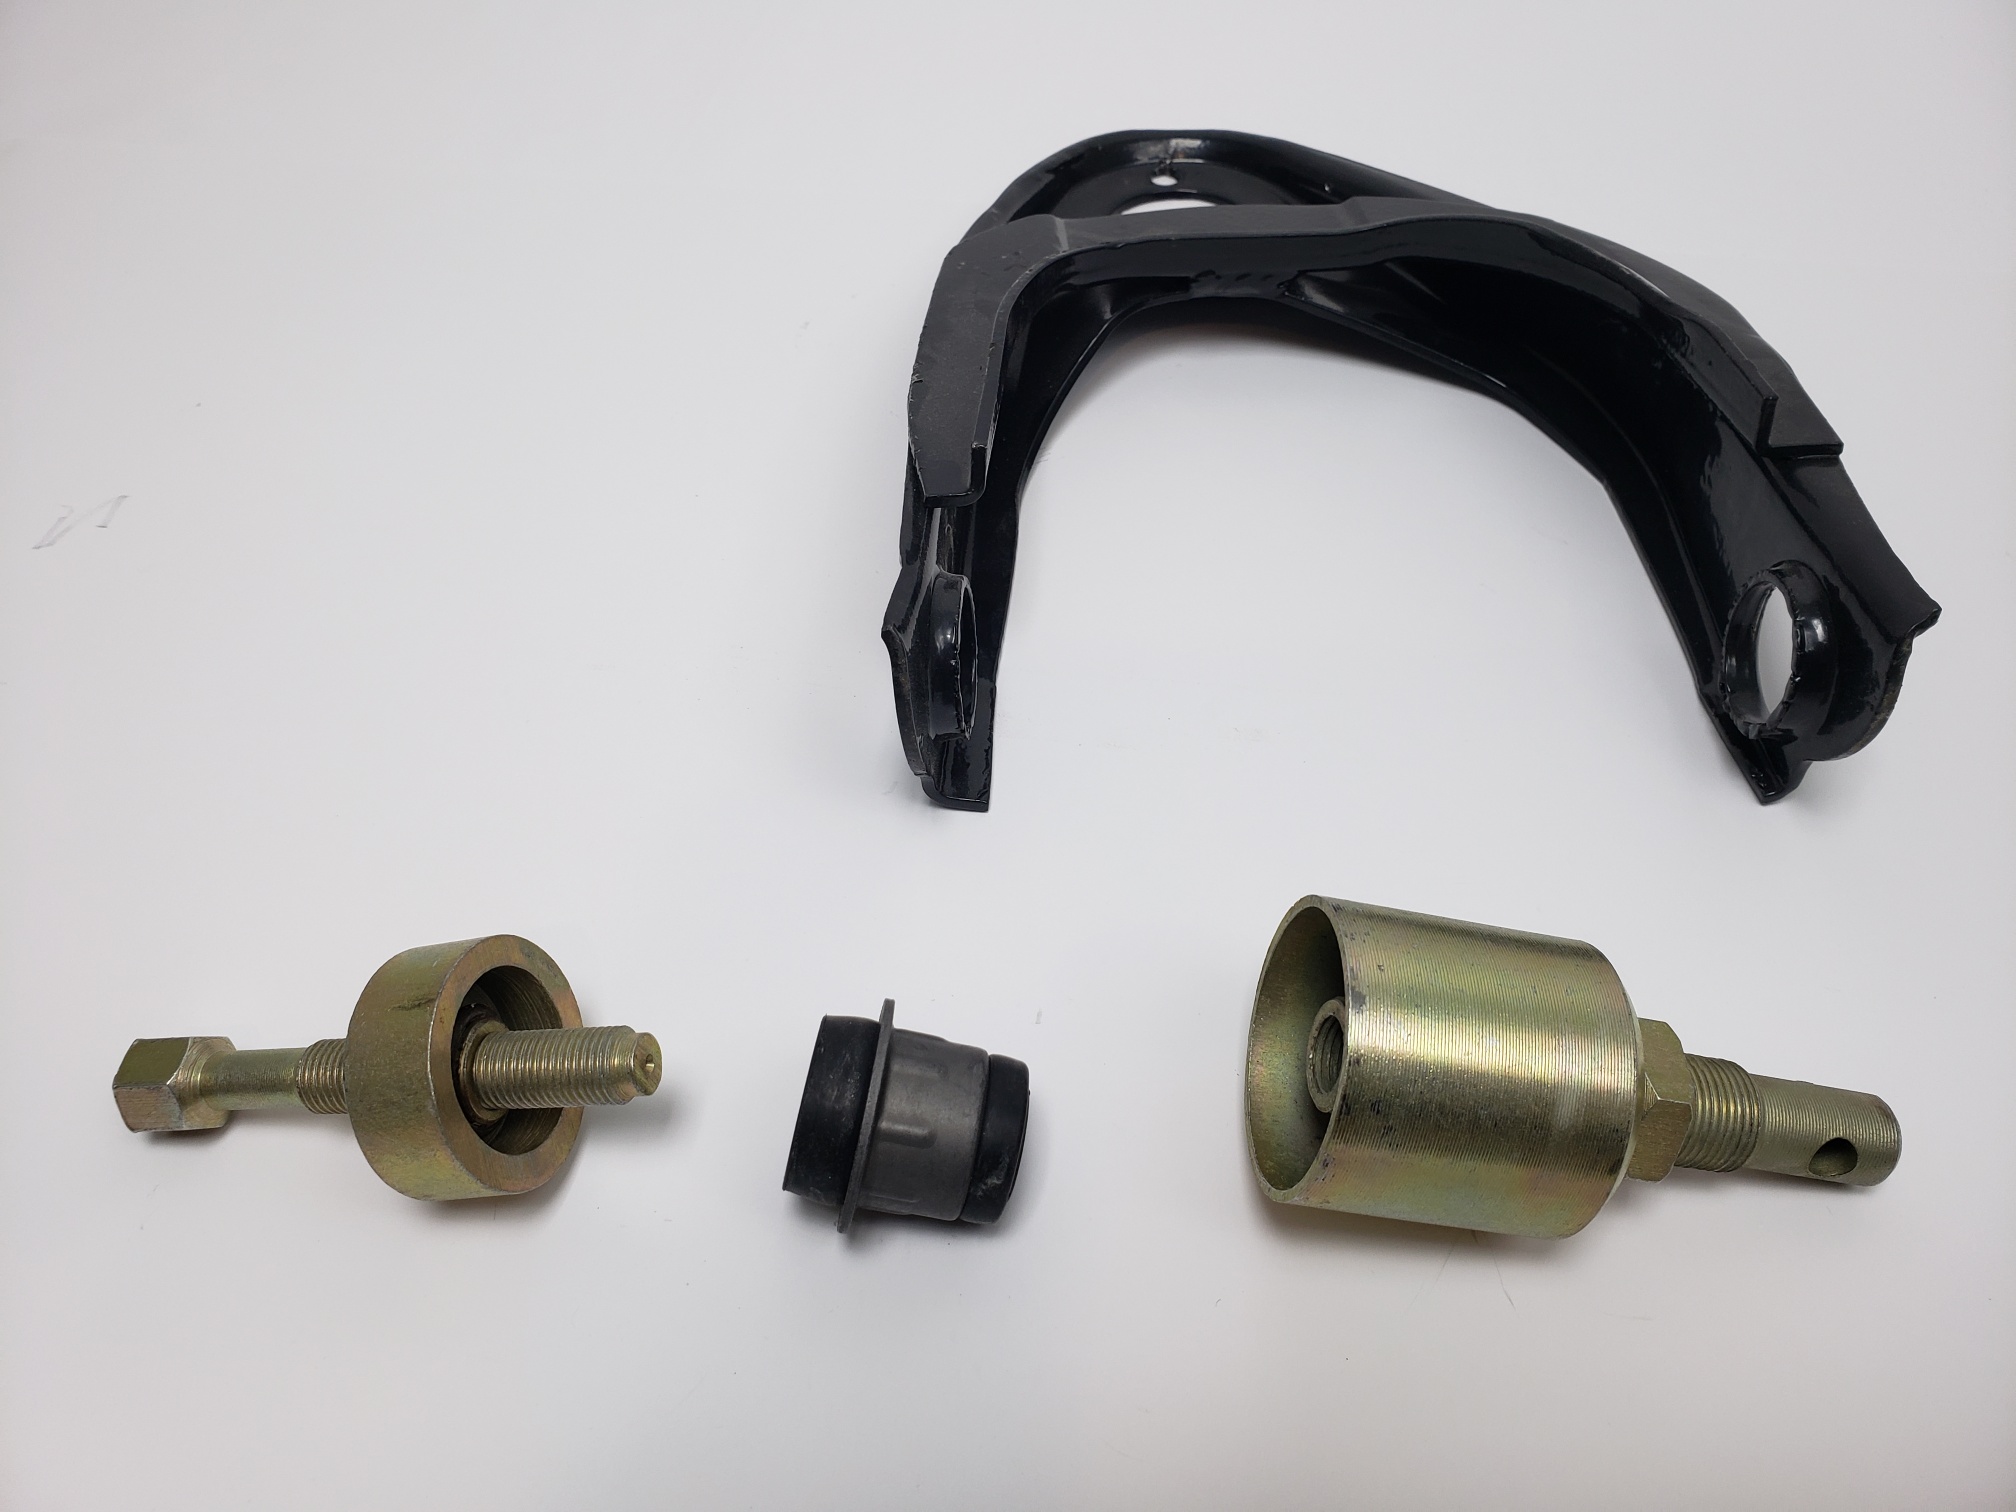
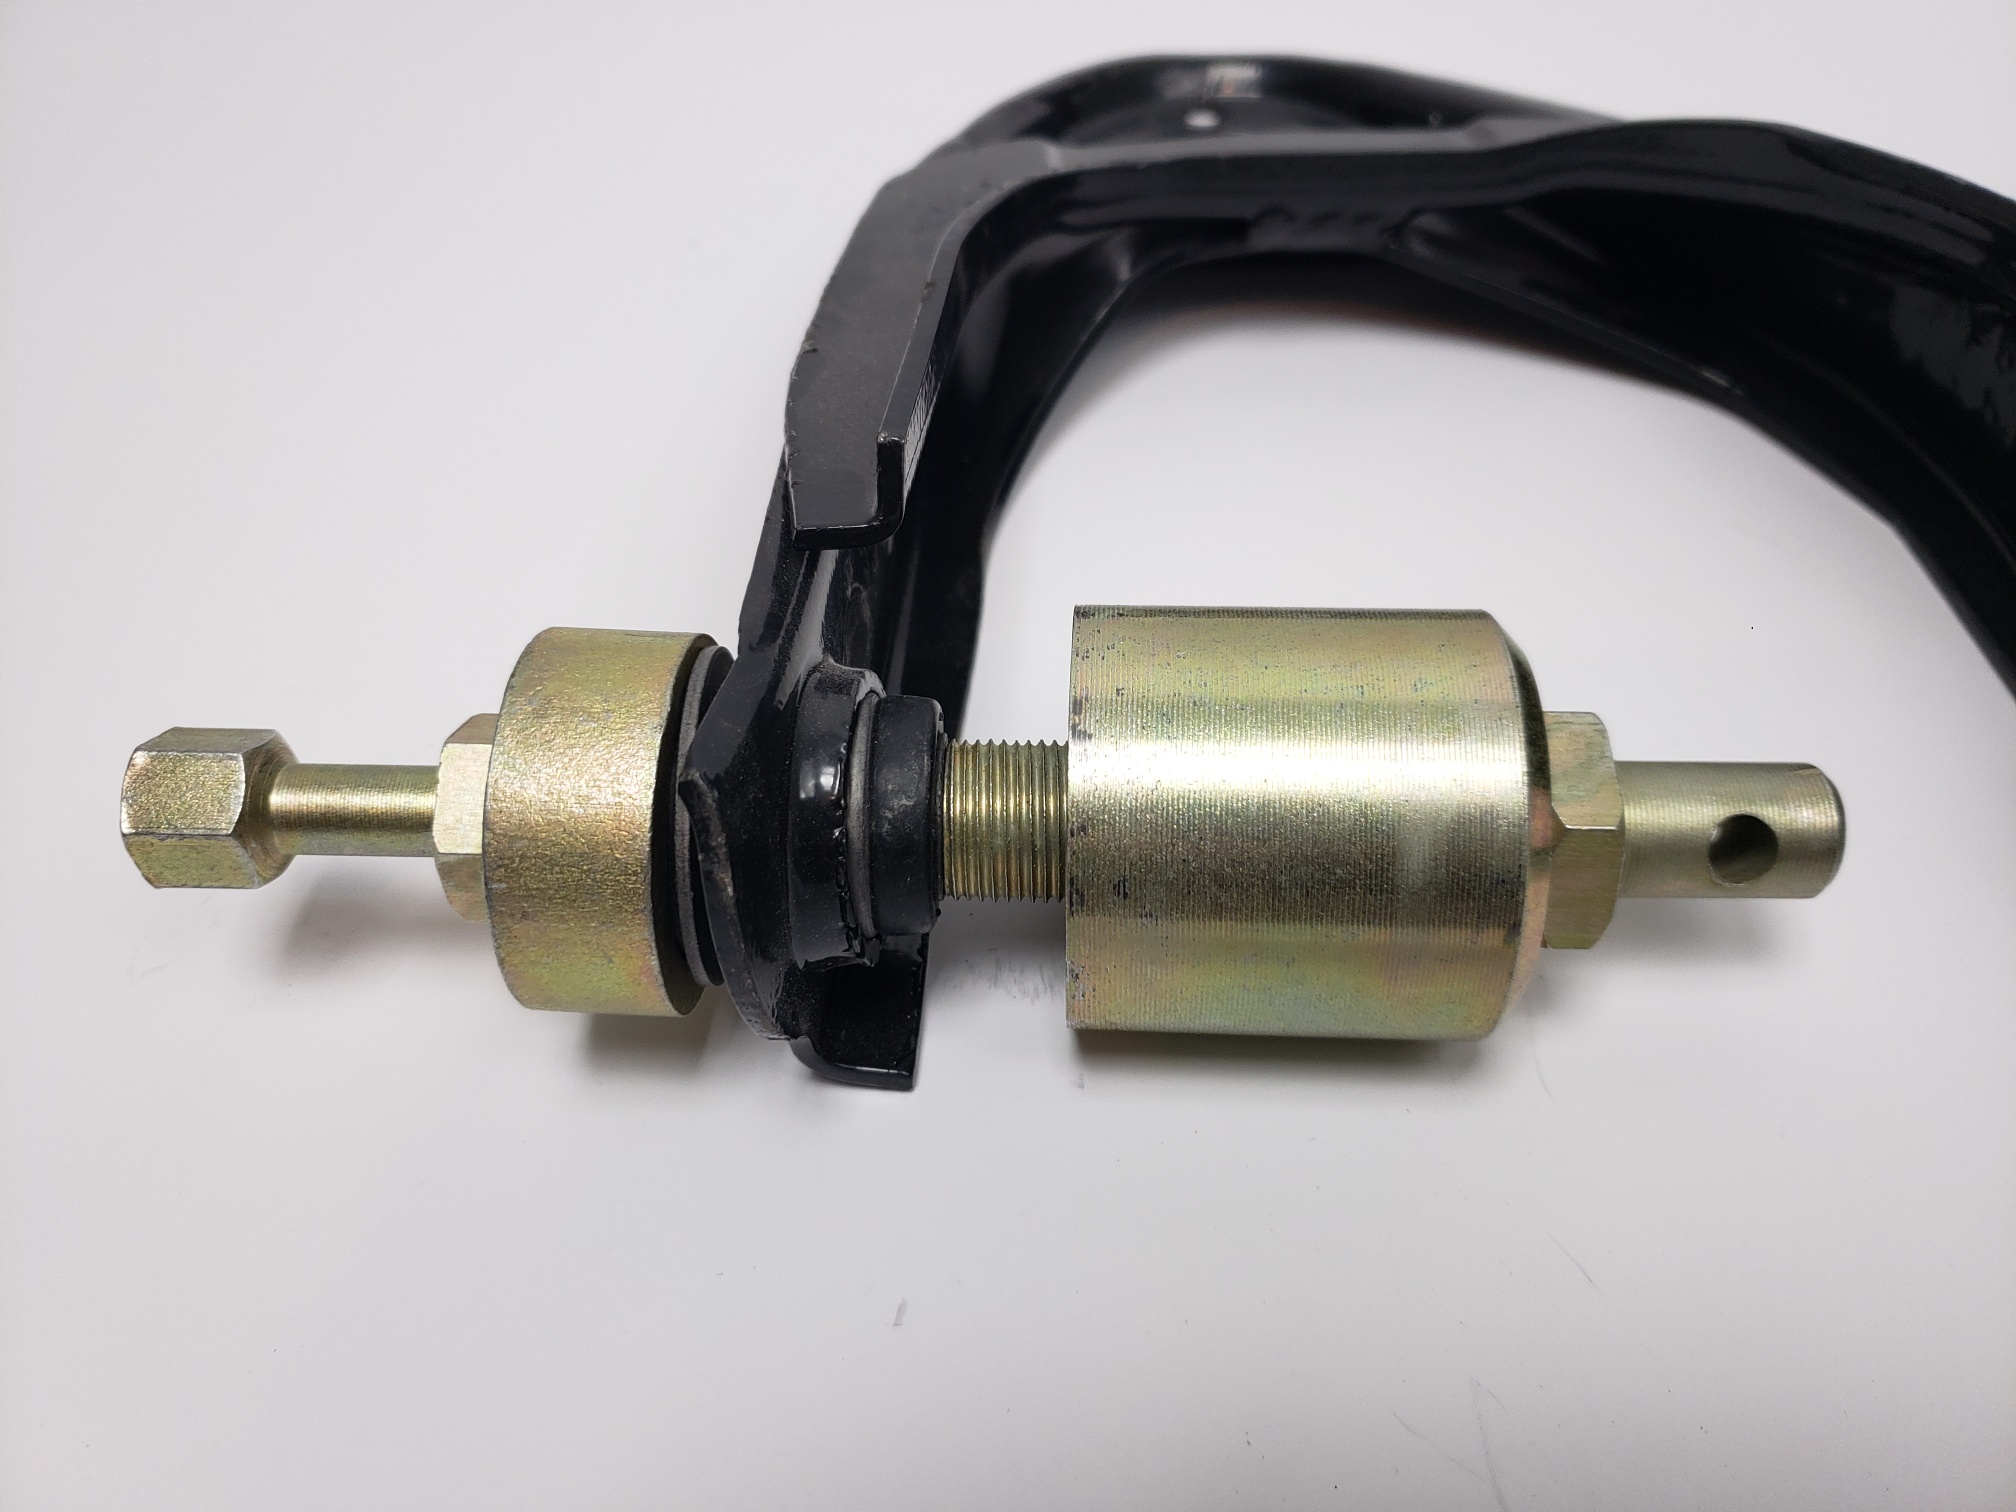
- SU2-410 bushing tool (check picture to familiarize yourself with the different parts
- Hammer
- 22 and 27mm wrenches
- Screwdriver or rod to keep tool L3’s inner shaft from turning
Lower bushing removal:
- Before starting, maybe even the day before, douse the bushing outer sleeves in penetrant.
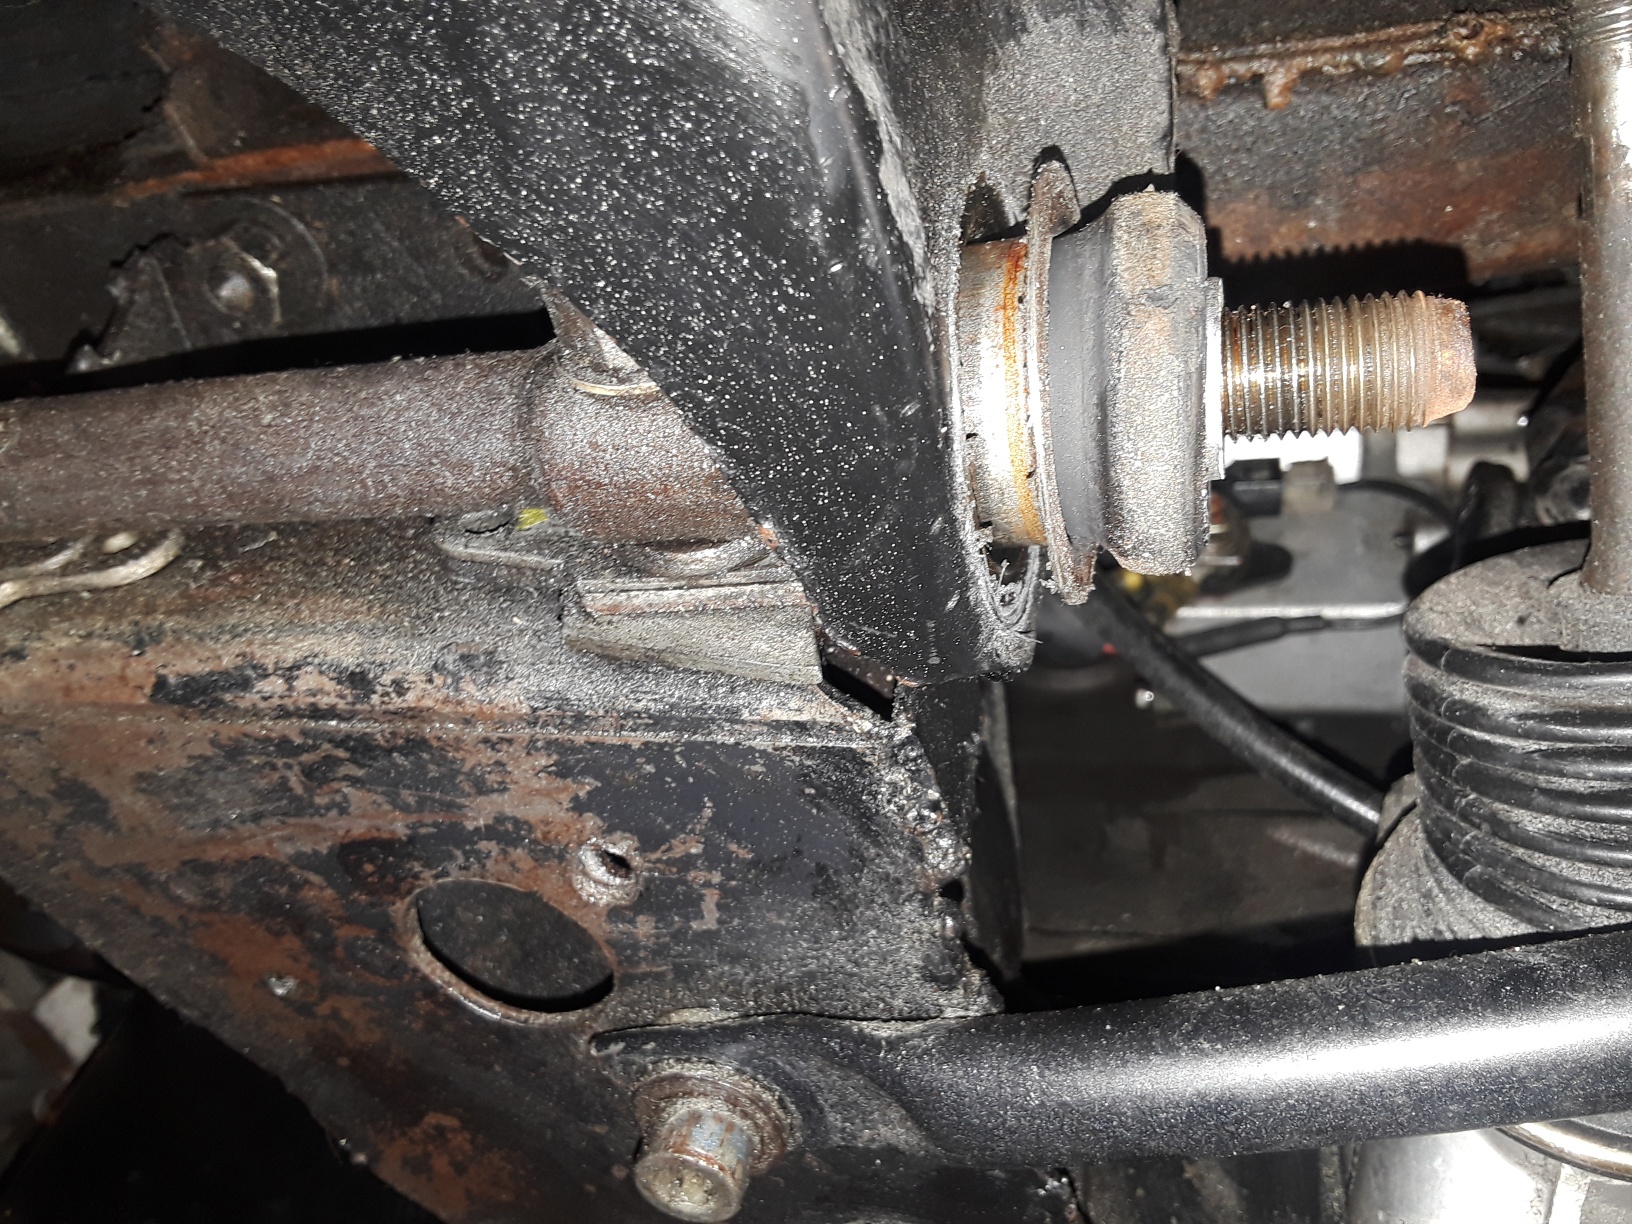
- Remove lower arm pivot nuts and washers (22mm wrench).
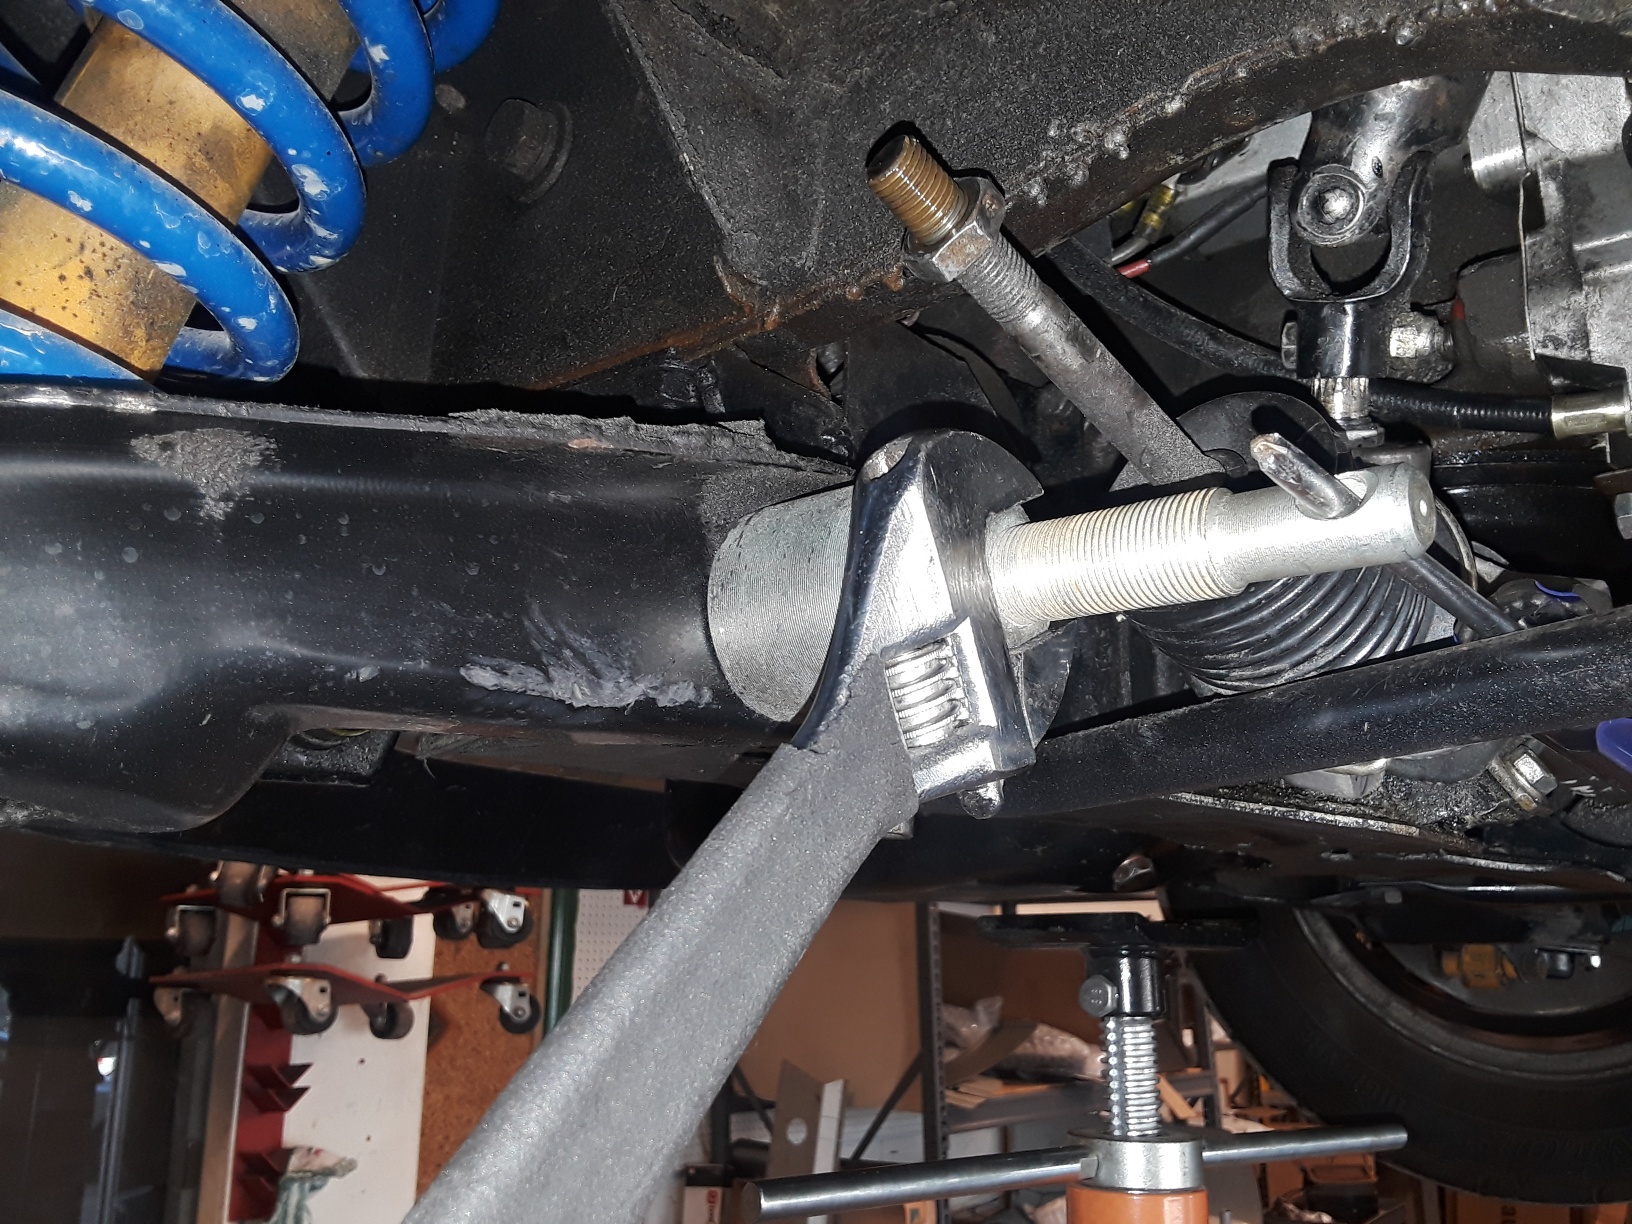
- Thread the center shaft of the lower bush tool (tool L3) onto the lower arms shaft (see picture/s below).The outer part of the tool has to be far enough back so that the center shaft can fully thread onto the a-arm shaft.
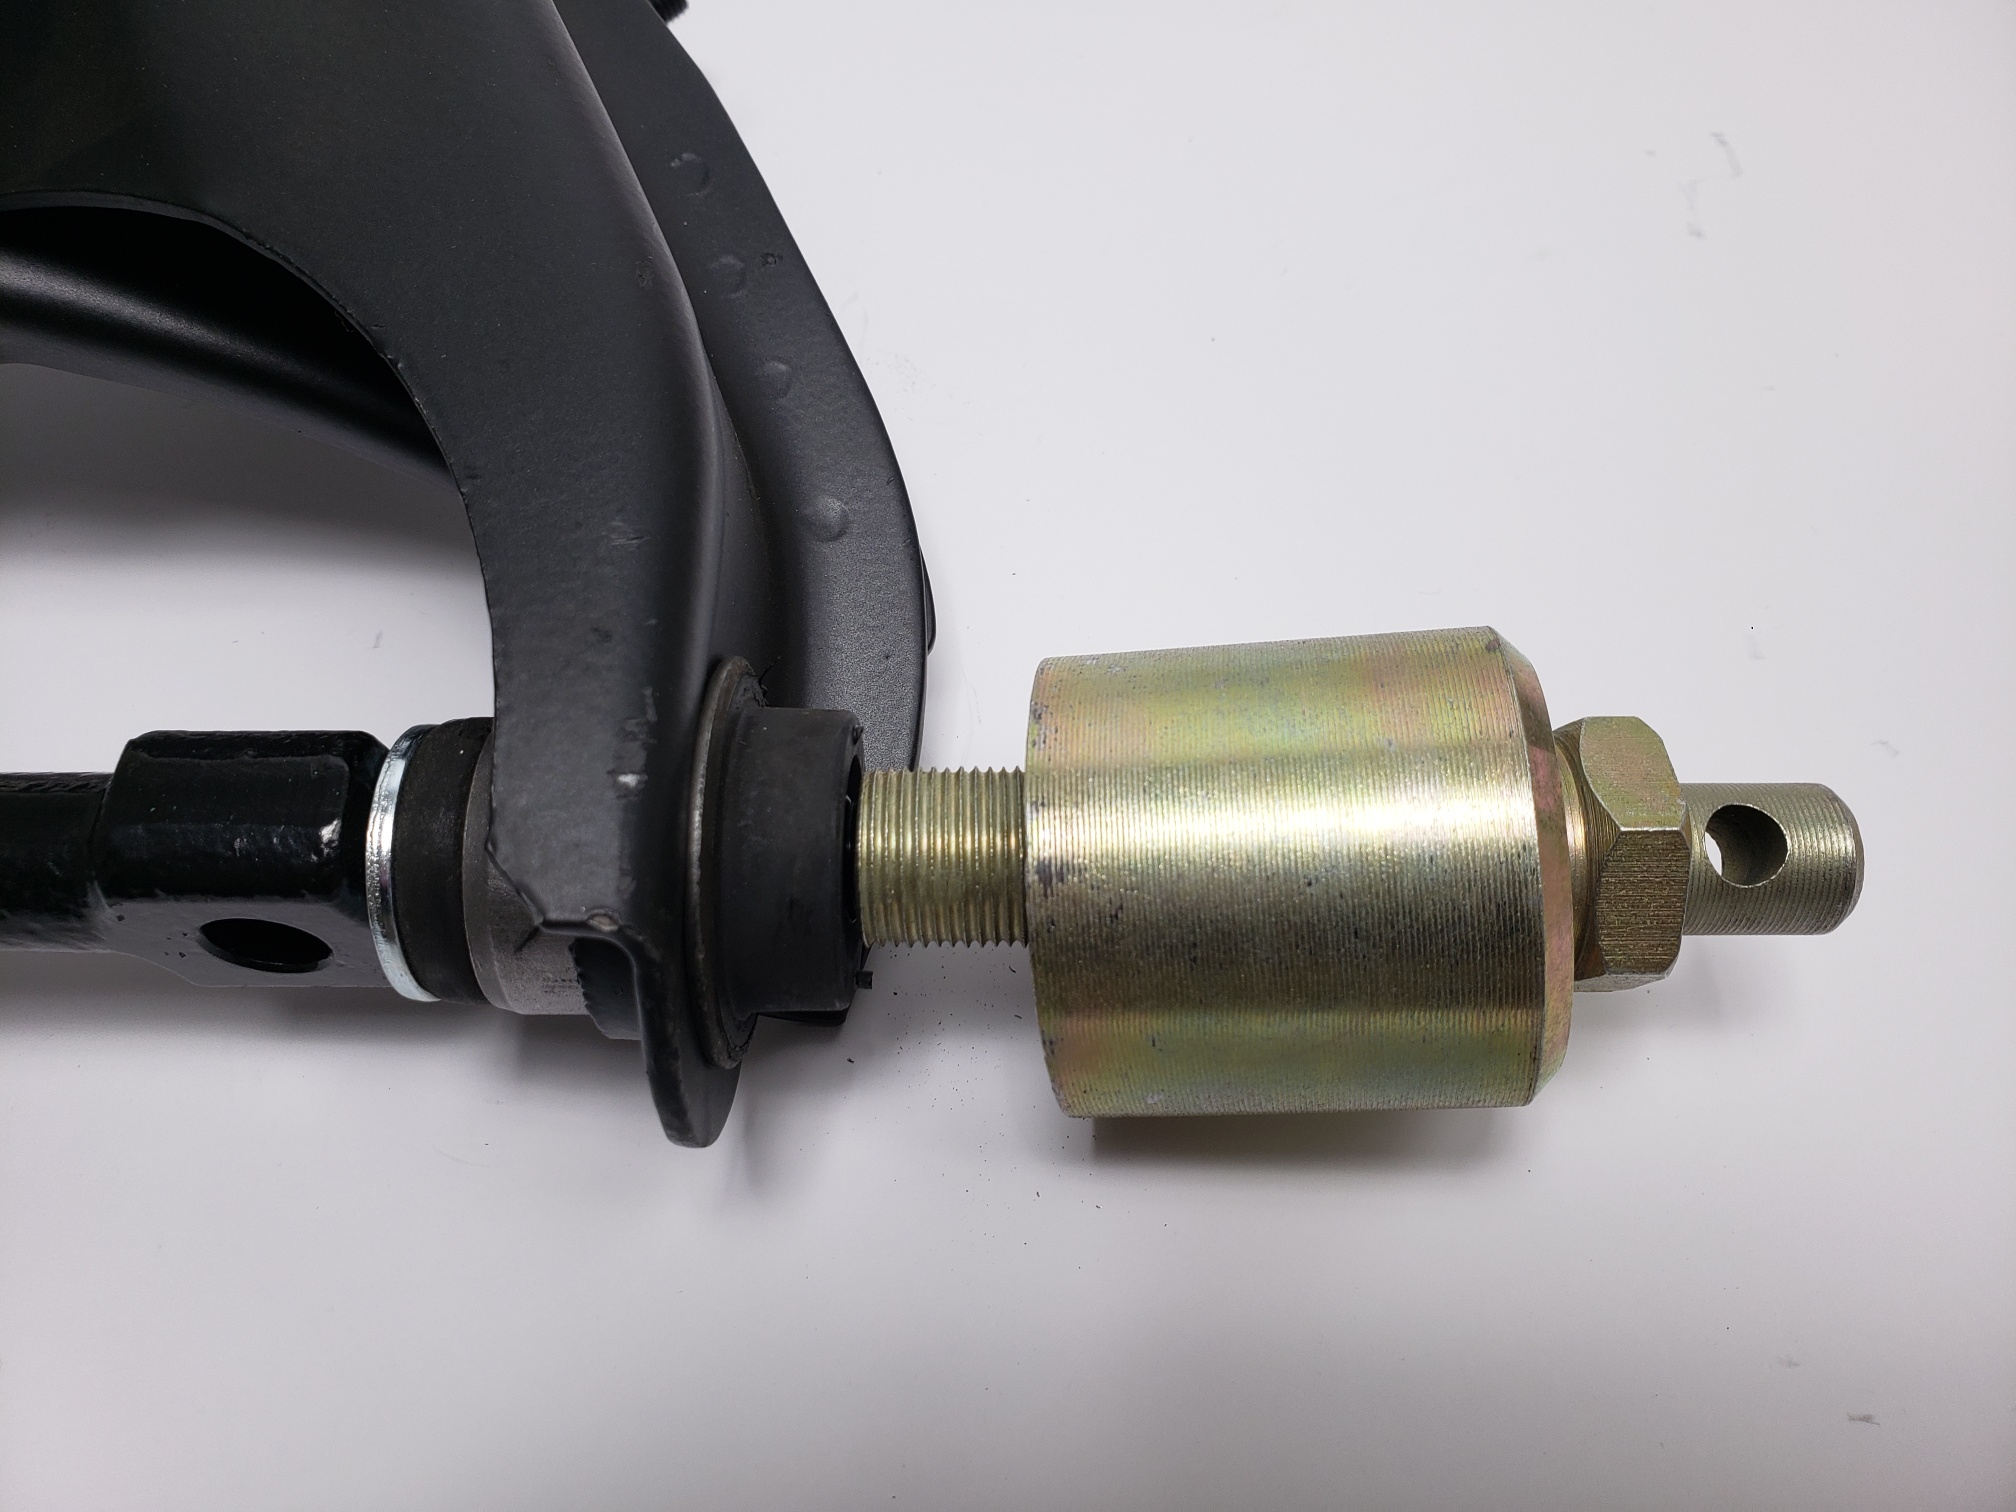
- Once the center shaft of the tool is firmly connected to the a-arm shaft turn 27mm nut behind the outer section of the tool until the outer section contacts the side of the a-arm (see picture/s below).No part of the bushing sleeve should be under the tool, as the tool has to push on the arm, but not the bushing.
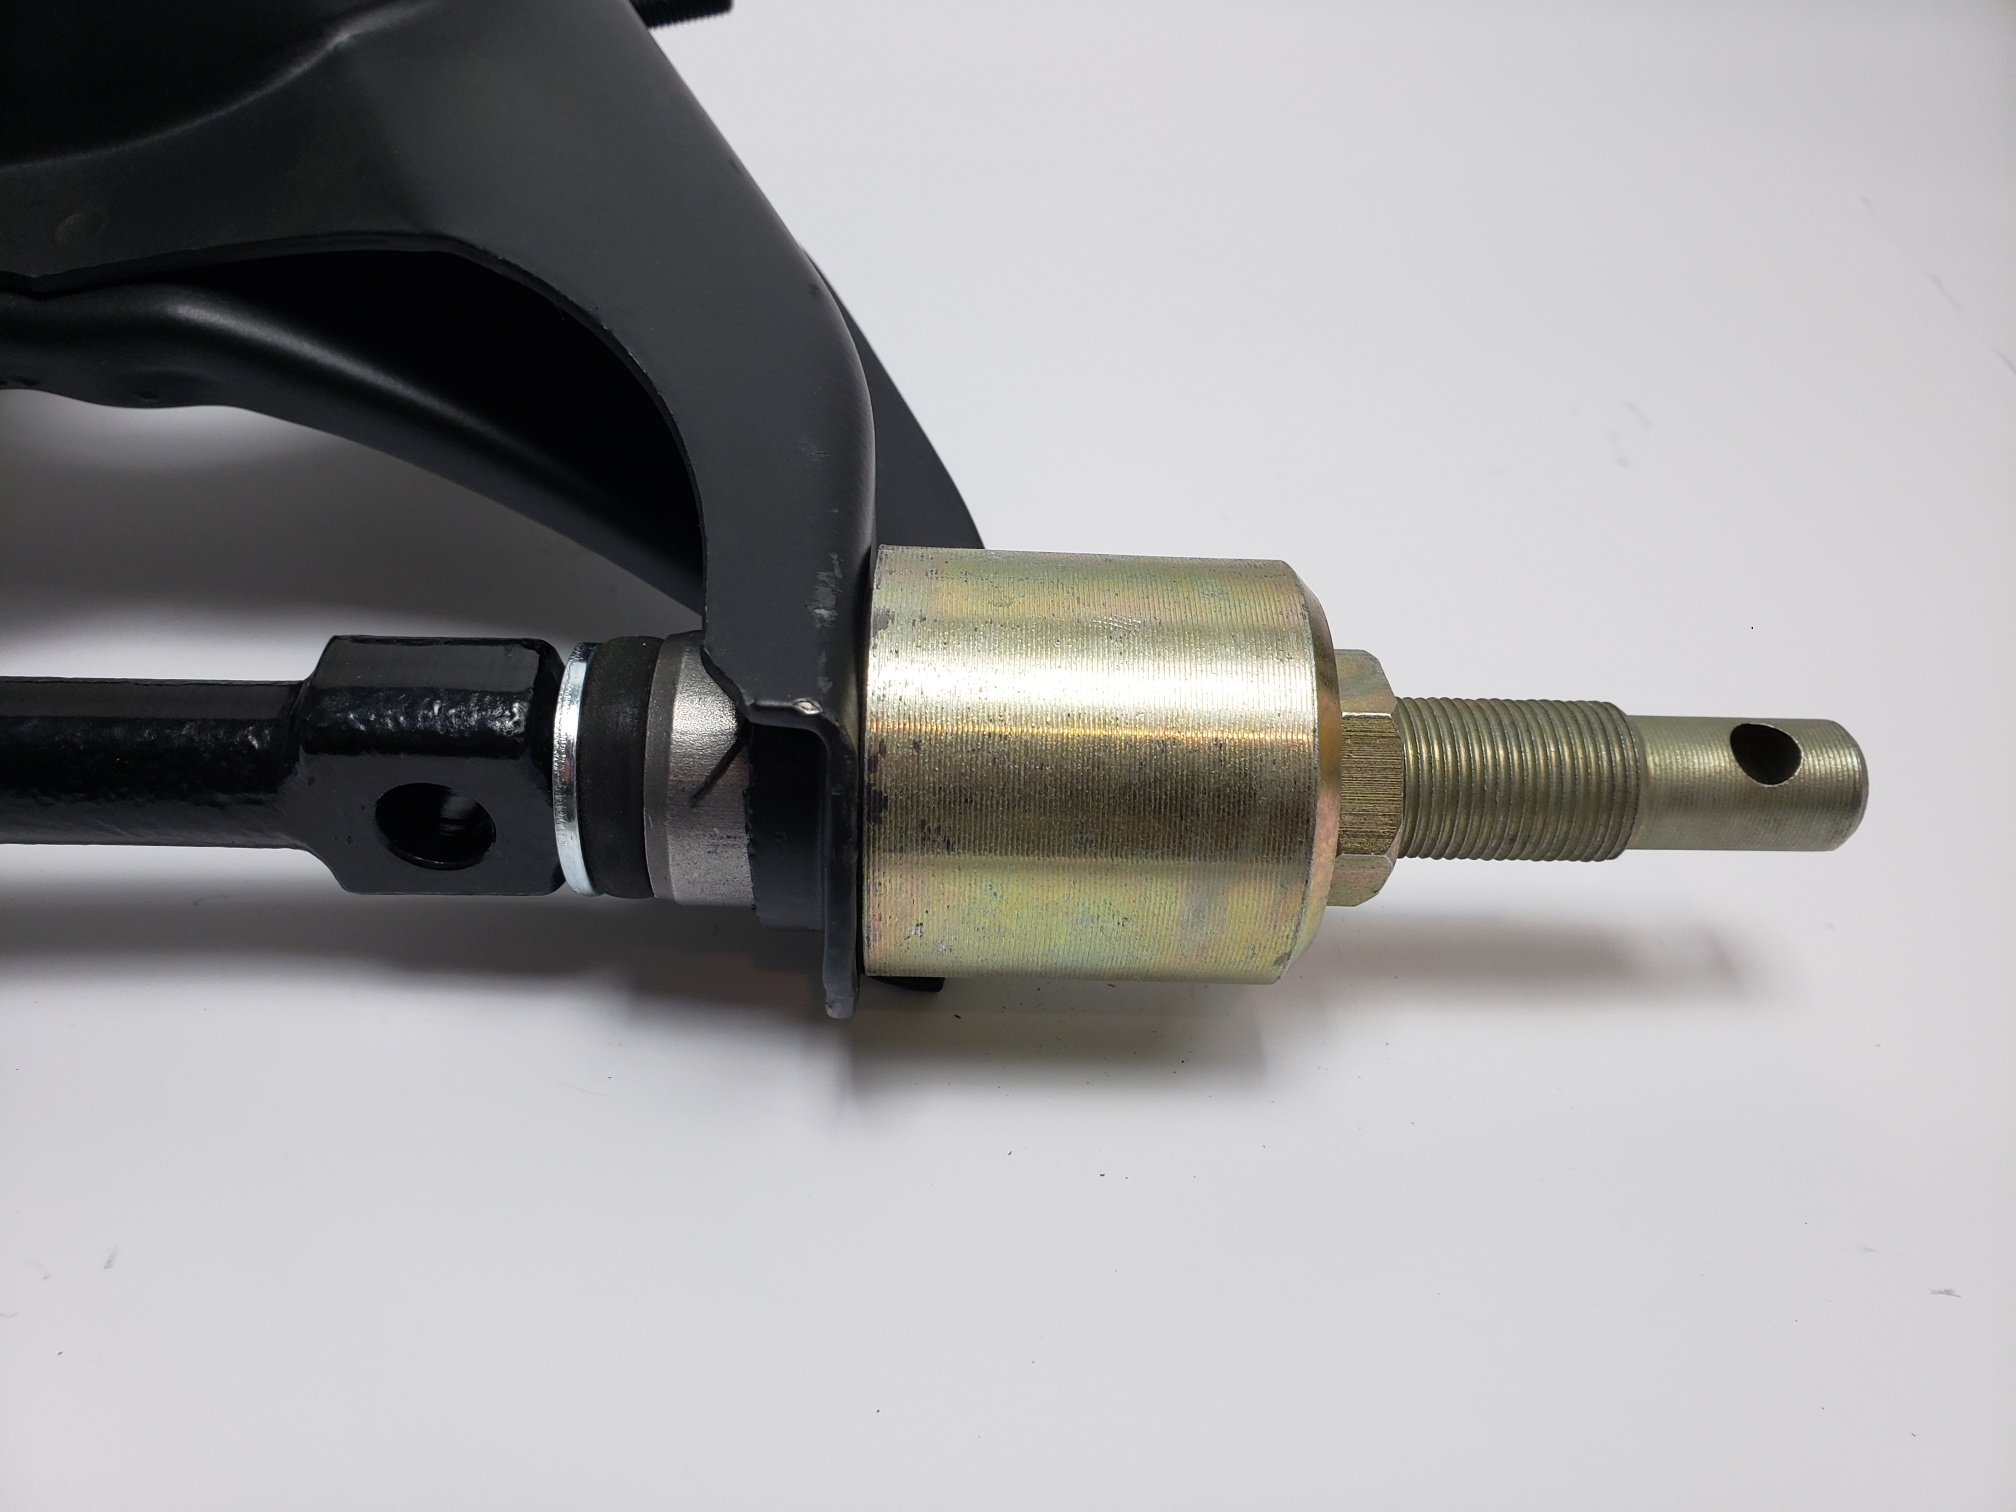
- Use a 27mm wrench to turn the nut.The inner shaft may need to be held stationary, to do this put a rod through the hole in the end of the shaft (see picture/s below).
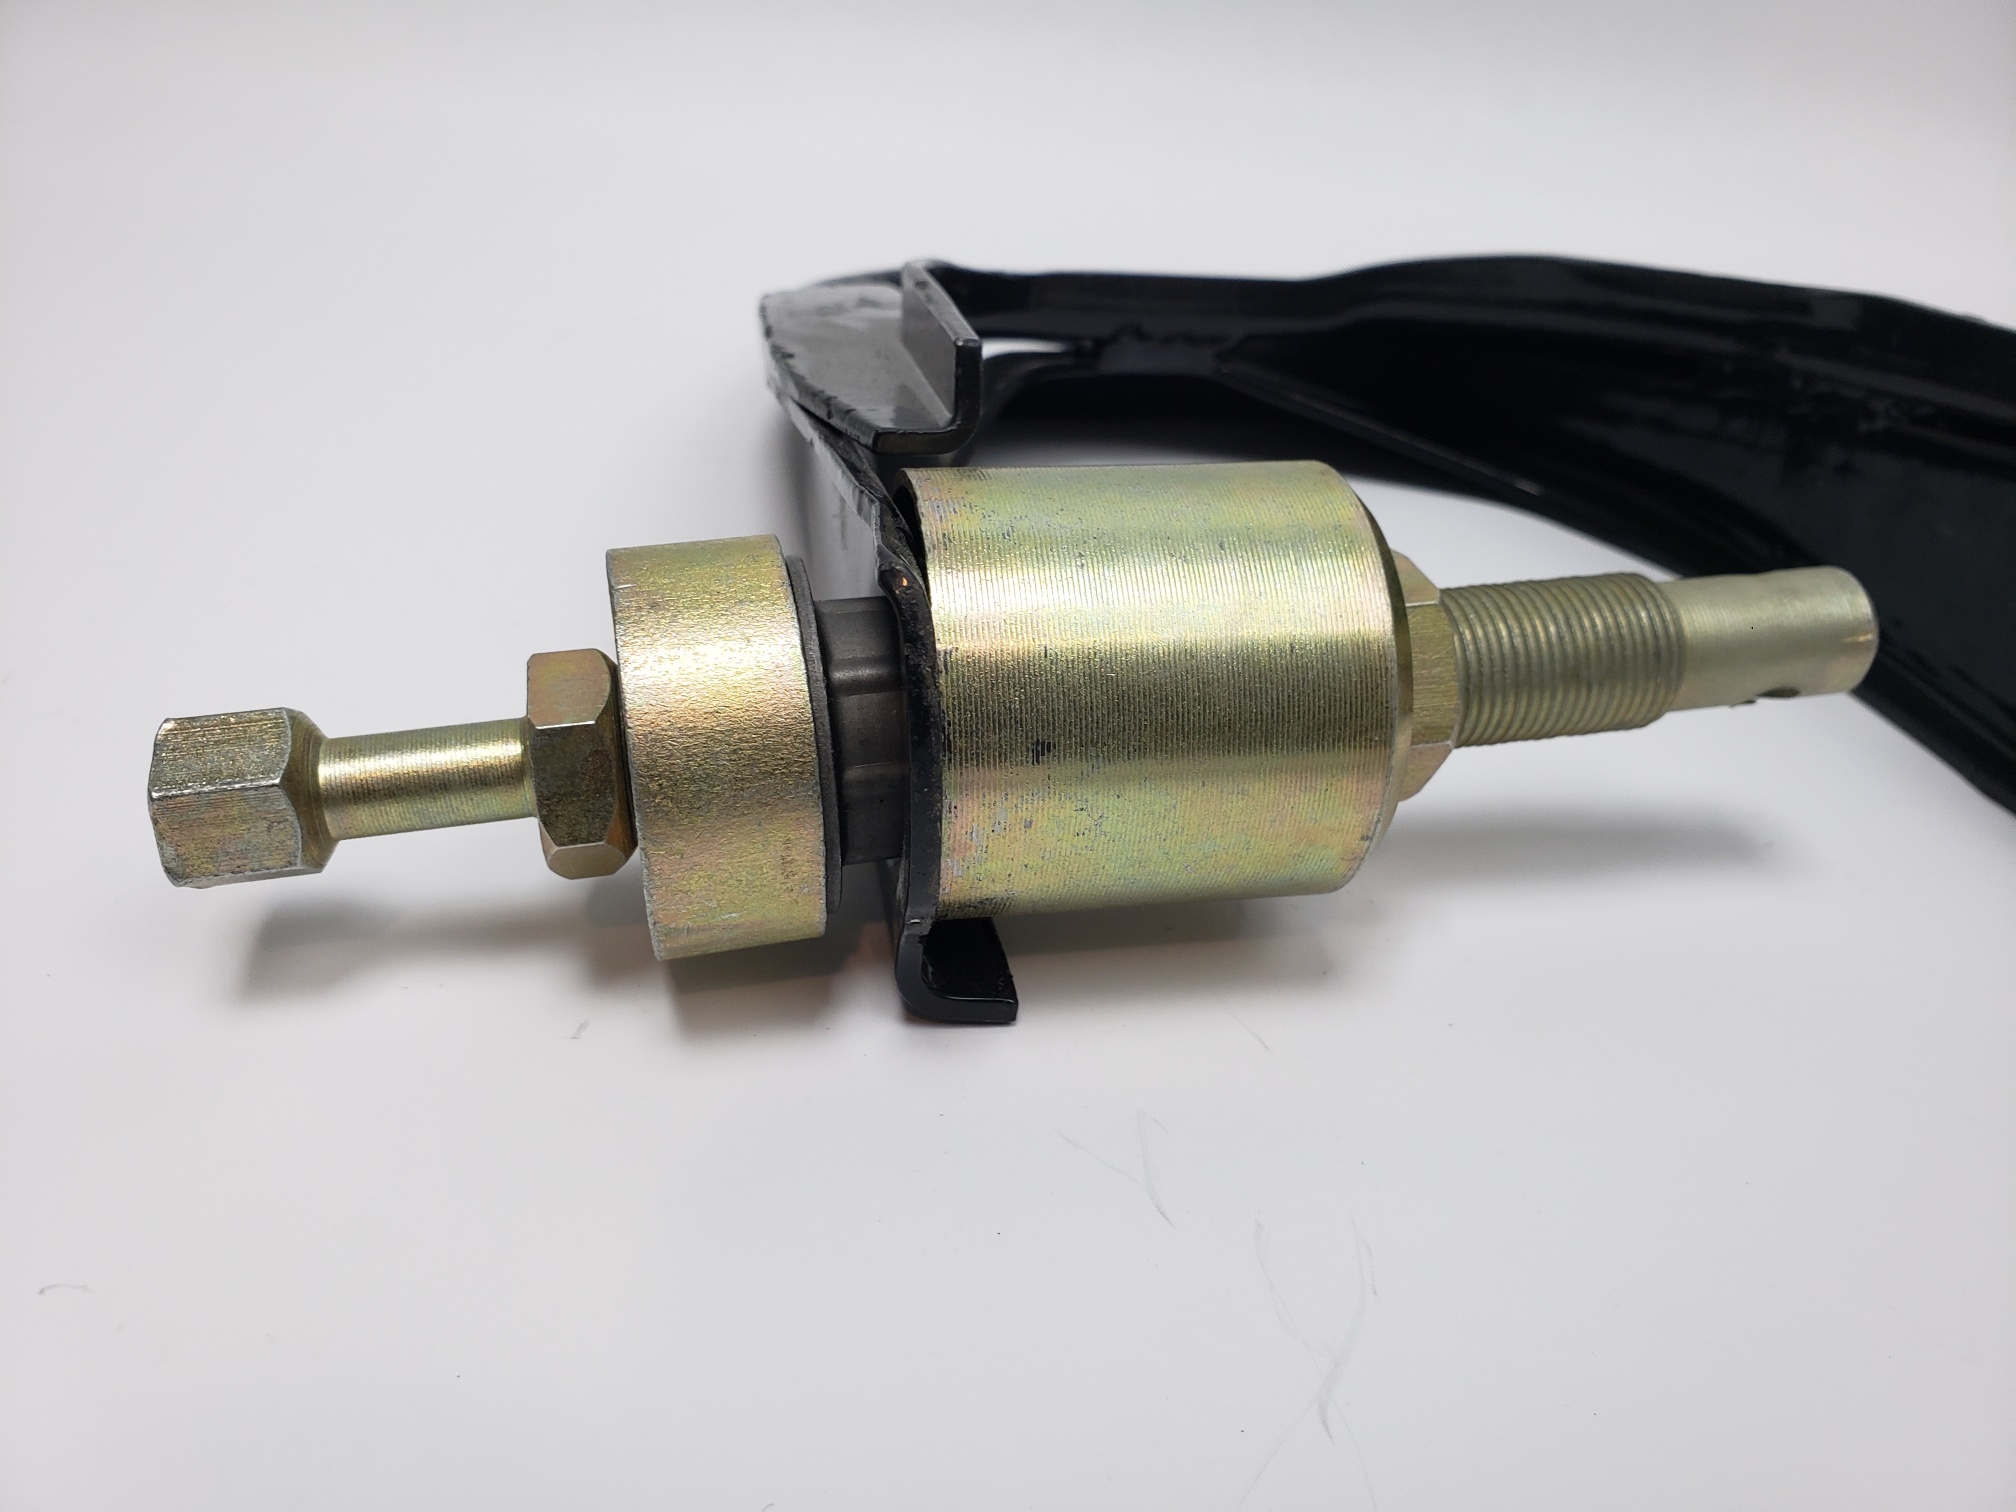
- While turning the nut every now and then stop and hit the arm with a hammer to help move the bushing.
- The outer part of the tool will push the arm away while keeping the shaft stationary, thus releasing the bushing.
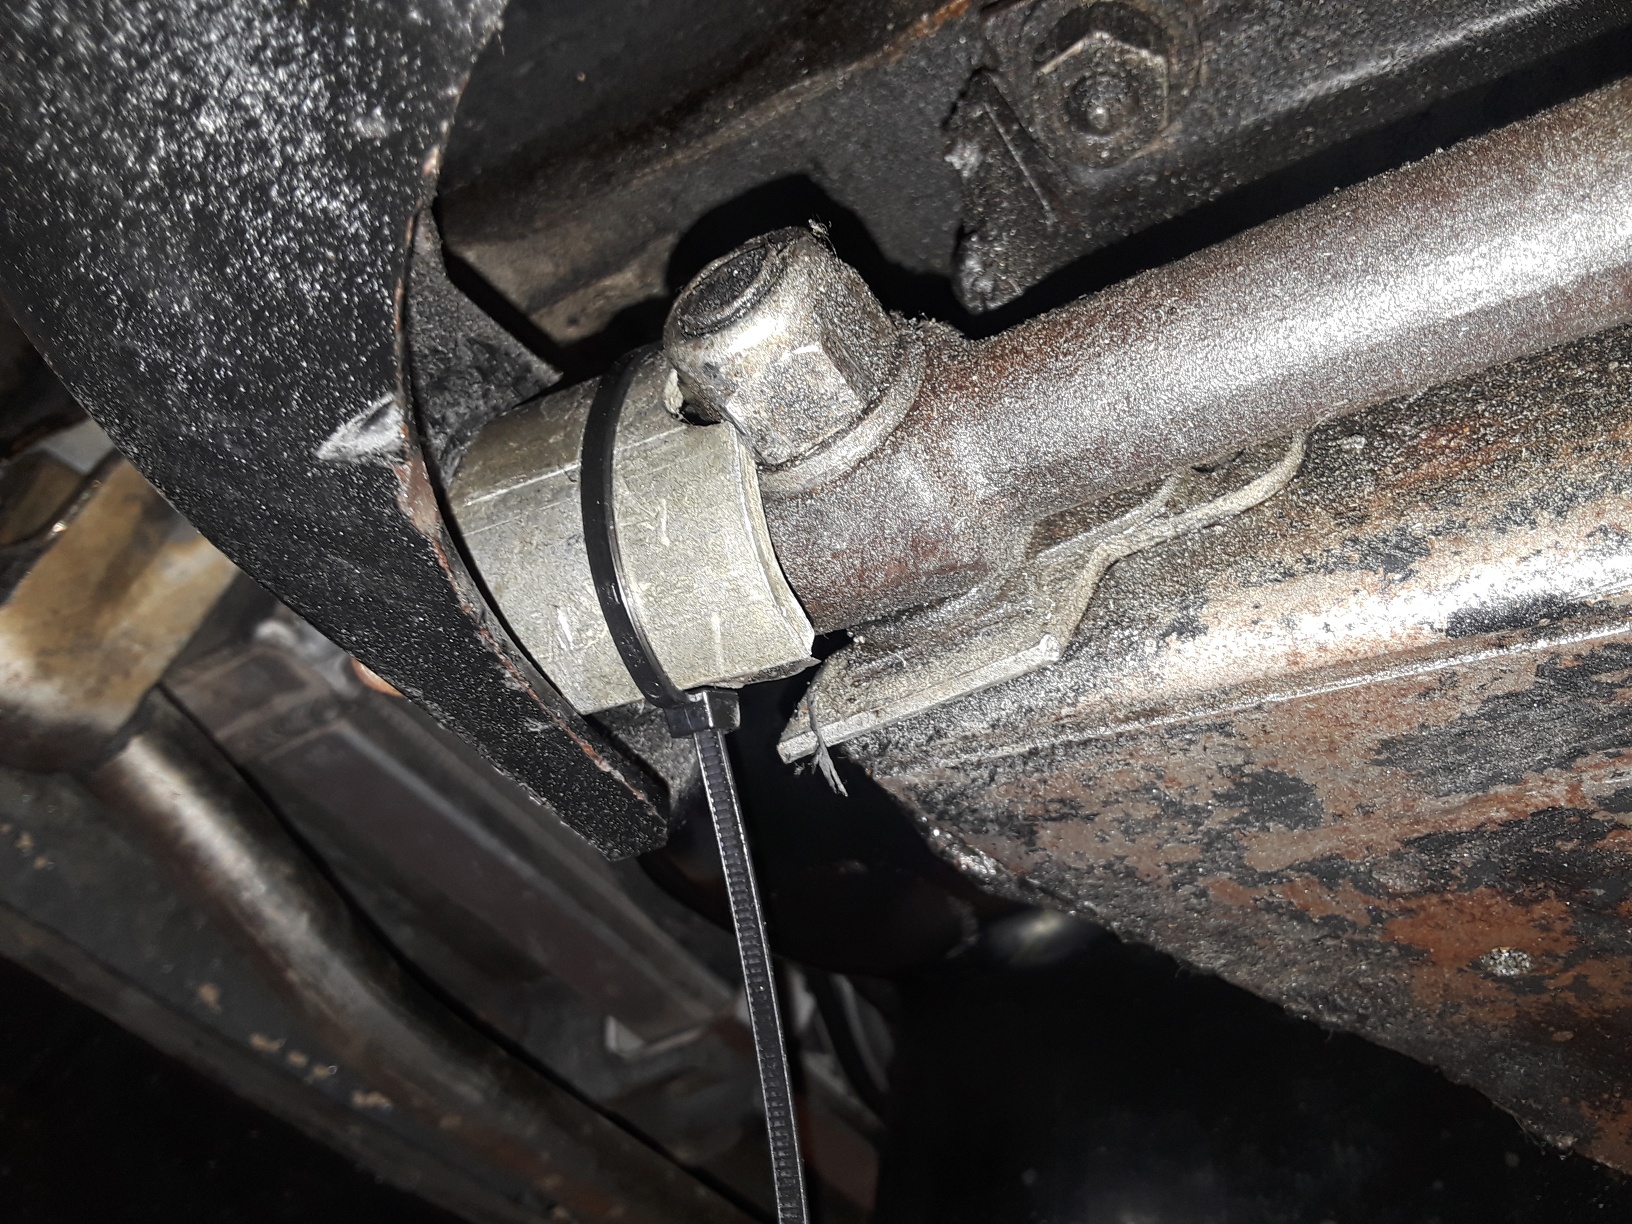
- Once the bushing is released remove the tool and retrieve the bushing (see picture/s below).

Lower bushing installation:
- Clean the hole in the arm and the shaft with wire brush or emery paper.Spray penetrant or grease on the opening of the arm.
- Put the new bushing onto the a-arm shaft and push into the arm as far as possible (see picture/s below).

- Put the installation tool (tool L1) tool between the crossmember mounting stud and the inside of the arm (see picture/s below).
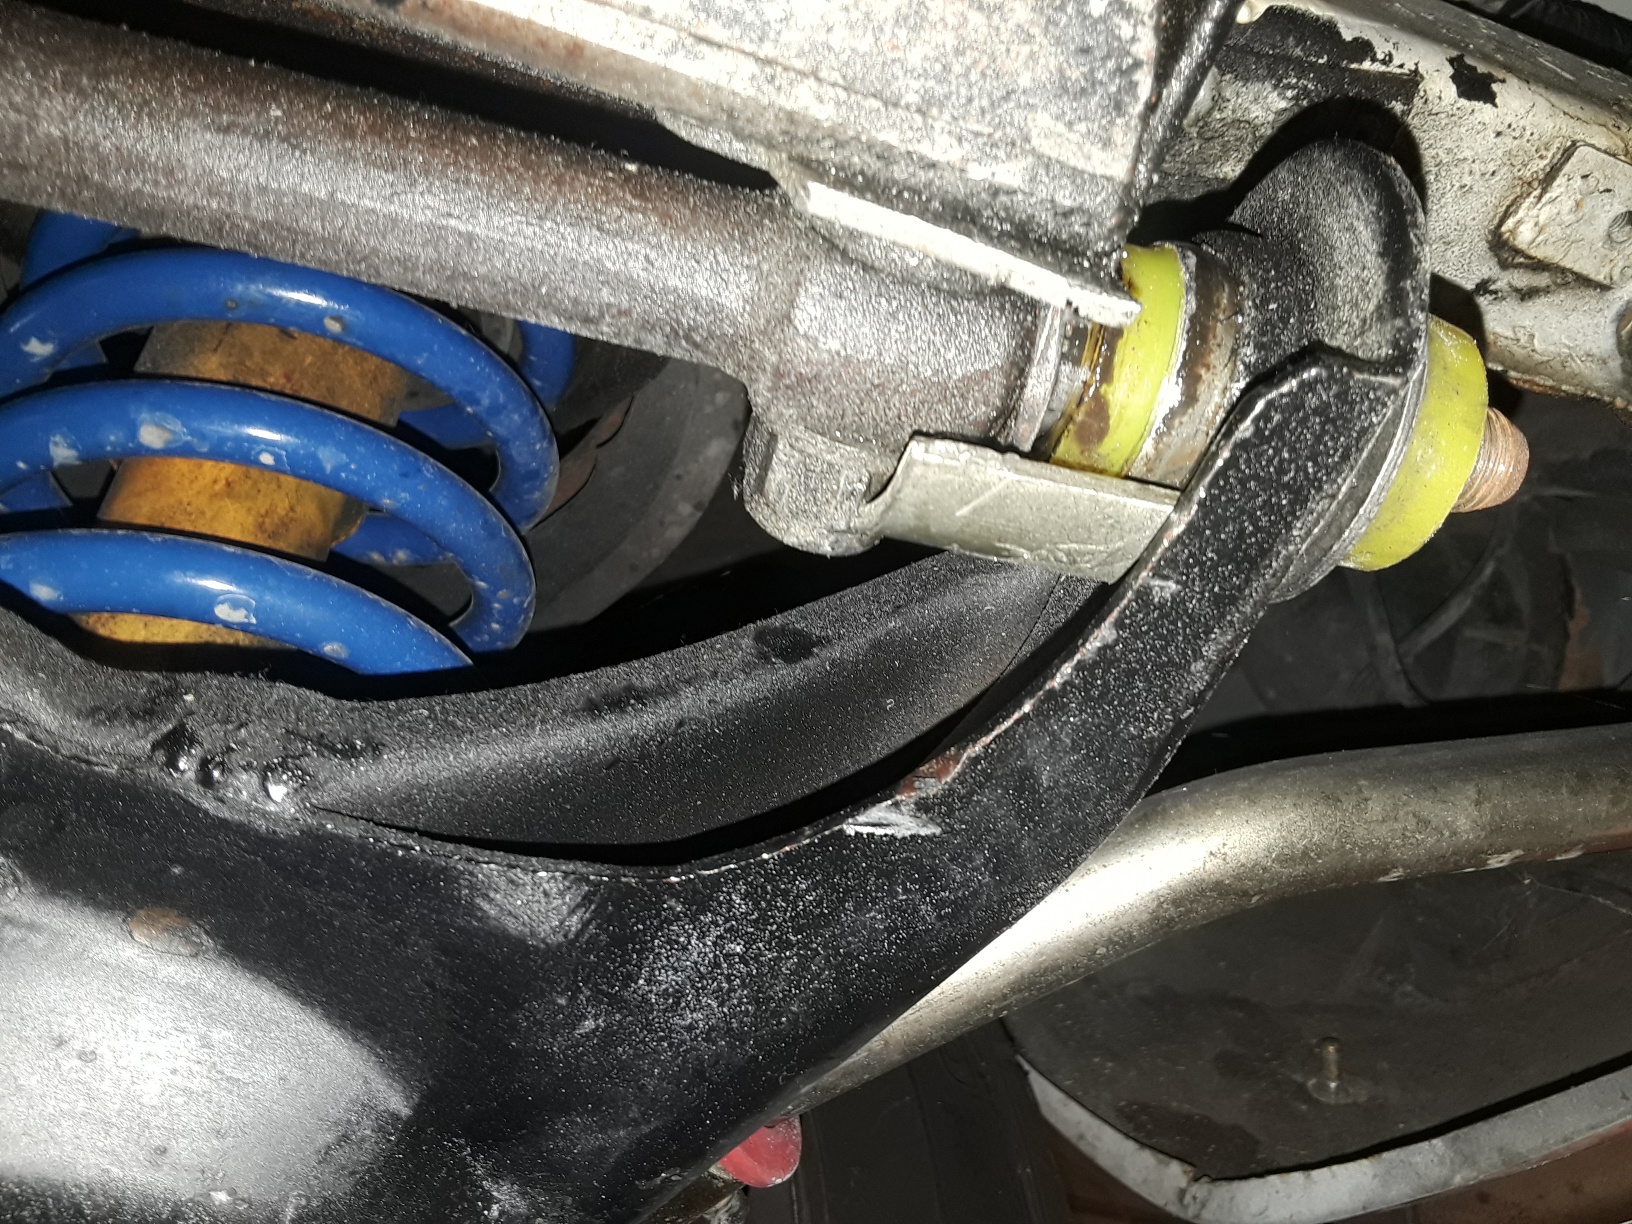
- Use the 32mm socket (tool L2) to hammer the bushing into the arm.
- Do not install the nuts and washers until both front and rear bushings have been replaced.
- Tighten 22mm pivot nuts with the vehicle on the ground (ie. with the car’s weight on the suspension).
Upper bushing removal and installation:
Note: normally the shock absorber will hold the lower a-arm and spring when the upper arm is removed, but for safety place a jack or jack stand under the lower arm before removing the upper arm to take the load off the shock.
While it is possible to replace the upper a-arm without completely removing the arm, it is not easy and we recommend doing it on the bench.
- Remove the upper a-arm.
- Remove the old bushings, they can be easily hammered out or knocked out with an air chisel.
- Insert the bushing into the tool (Use tools U1 & L3) and assemble the tool as pictured (pics Up1, Up2, Up3).

- Turn the nut to press the bushing into the arm (see picture/s below).
- IMPORTANT: only press the bushings until the ridges contact the arm.The bushings do not get pressed in all the way.If unsure how far they need to be pressed in just do it little by little and remove the tool and fit the arm onto the shock tower to see how well it fits.Ideally there should be slight resistance when installing the arm onto the shock tower.